Translator

Tuesday 25 July 2017

Life Moments


Hi everyone, today for my DT card at Cheery Lynn Designs I am sharing some more inspiration with their fabulous new release of Vintage Dies, gosh I'm loving this new collection so much. My card today would also look great as a scrapbook layout and could easily be made more feminine in design by changing the colours and adding a few flowers.


I started by adding some film strips to my cardstock, distressing the card at the edges and adding some Distress ink. I positioned my film strip die on my photos and cut them, this way they were the perfect size to insert into the film strip.


I matted and layered my centre dies, cutting one out in the dark red to make my Design 'pop', adding a stamped sentiment and foam strips between my layers for added dimension.


My Vintage Camera was highlighted with a silver pen on the embossed areas, I also added a touch of Gilding wax onto the concertina area to look like old leather. I layered up the front and back areas 3 times to give added dimension, paper piecing these bits together in a similar way I built my Gramophone which you can see HERE.

Thanks so much for stopping by today and I hope you feel inspired by my card.
Crafty Hugs, 

Julie x  

Cheery Lynn Dies Used -

Friday 21 July 2017

A New Baby - Craft Consortium


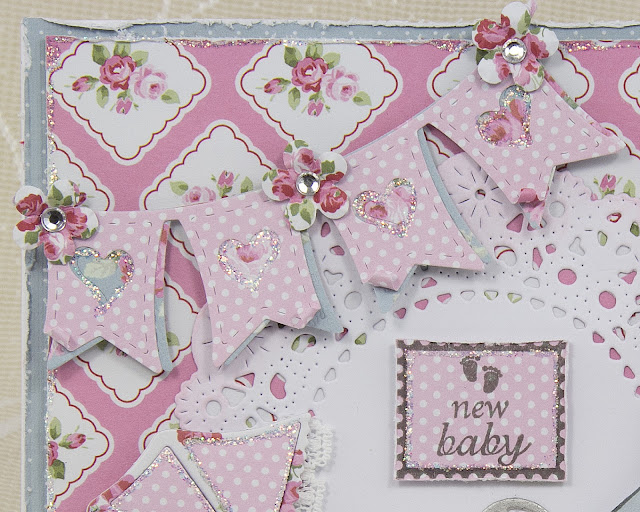
Hi everyone, thanks for stopping by today to see my DT post for Craft Consortium using the gorgeous floral pad called Wild Rose. I love this pad and its versatility for many style of cards and today I have made a baby card which could easily double up for a young girl that loves her dolls by changing the sentiment.


My layers were tattered with my scissors and some foam tape added in between for extra dimension. I also added some Crystal Stickles Glue around the edges and onto my die cuts.


My pram was layered with two of the papers from the pad adding on some die cut flowers, lace and a pretty Floral Embellishment.


My doll stamp was fussy cut, layering her dress up with coordinating papers from the Wild Rose pad and a touch of lace.


I finished with some bunting, a stamped sentiment and lots of bling.

Thanks so much for all your lovely comments and please do check out Craft Consortium and follow them on Facebook and Instagram for regular inspiration and giveaways.

Crafty Hugs, 
Julie x

Craft Consortium Products Used :

Cheery Lynn Die : DL102 French Pastry Doily

A Head Full of Worries - Cherish The Memory


Hi everyone, today I am sharing another DT post for Cherish The Memory using their amazing new collection called Summer Feelings. The collection is absolutely stunning and also has some lovely Dies to compliment the papers.


I started by using a wooden plaque I bought from a Bargain store and added a strip of pearls around the outside layering on a tattered piece of cardstock from the collection. I also added Glossy Accents, Glass Glitter and small Art Stones for a beach feel.


I stamped my sentiment onto paper from the coordinating 6x6 pad add lots of details to make it look like a shabby beach feel. I had collected sand and some shells from the beach when we were on our honeymoon many years ago and I thought this was a perfect time to use some of them.


The dreamcatcher I adore, I offset my feathers with an extra layer adding some feathers I pulled out of a cushion to give another texture. I added touches of glitter lots of pearls and a resin flower from Craft Consortium.


I hope you like my post and feel inspired to do a beach themed project.

Please check out Cherish The Memory Etsy Shop to see their beautiful range of papers and craft packs with new items being added weekly. You can also follow them on the following links :

Thanks again for your visit I really appreciate it and hope to visit your blog soon. At present life is just getting in the way to keep up with all social media.

Crafty Hugs, 
Julie x   
Cherish The Memory Products Used-

Thursday 20 July 2017

Flowers for you - Cherish the Memory


Hello, thanks for stopping by to see my DT post with Cherish The Memory. My card today I have used a lot of the die cut flowers from my Romantic Vintage Diecut book to make this Floral bouquet on my card.


My base layers have been tattered at the edges adding a little crinkle detail into one of the corners.


My flowers and leaves have been all arranged on top of my Doily with some Silicone Glue. I added a pretty lace bow, a Pearl Embellishment and a couple of tags from the same pad.


I finished my card with some shabby thread and a couple of pretty butterflies with bling in their centres.


Cherish The Memory Products Used :

Also used -
Cheery Lynn DL181 Sun Flower Doily

Craft Consortium Pear Heart Embellishment 


Please check out Cherish The Memory Etsy Shop to see their beautiful range of papers and craft packs with new items being added weekly. You can also follow them on the following links :
 I am sorry that I am behind visiting your blogs but hope to catch up soon.

Crafty Hugs,
Julie x

Saturday 15 July 2017

Veriloquent Vintage Release Blog Hop - Cheery Lynn Designs July 2017


Today at Cheery Lynn Designs is Blog Hop day and what an outstanding release of stunning Vintage Dies this is. You are going to want them all !

I squealed with excitement when I saw the Gramophone ( Phonograph Die ), it reminds me of the Gramophone that sits in my dolls house. So let me show you how I built this Die up.


I started by cutting out my Die twice in Kraft Card, once in Miri card and once in Black card. I then trimmed all the sections I wanted in each colour and kept one complete section to glue all my parts onto.


I coloured my Kraft Card with a dark red and dark brown pen to give the look of mahogany wood, gluing all the sections together. Doing this helps to give added dimension to your die cut.


I also added a little gloss varnish onto my record and cut out the middle section with an old book page. 


Finishing with touches of Stazon Rusty Brown Ink at the edges of Miri Card to age it slightly.


My sentiment was stamped with Archival Ink and mounted onto the beautiful ornate new Dusty Miller Square Die.
Finishing my card with some pretty flowers and musical notes.

Thanks for stopping by and I'd love for you to leave me a comment before you hop over to LISA'S BLOG to see what beautiful Vintage Dies she has used on her card. 

Be sure to finish the Hop to be in with a chance of winning a $20 Shopping Spree at Cheery Lynn Designs.

Crafty Hugs, 

Julie x

Cheery Lynn Dies Used :
LPC16 Rectangle Pierce and Cut Tool

Friday 14 July 2017

Faith Hope Love


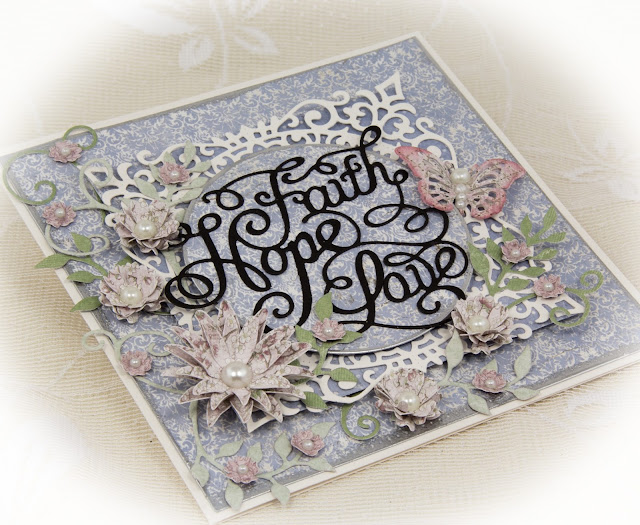
Hi Everyone, today for my DT card at Cheery Lynn Designs I am sharing a card with the elegant Die Cut sentiment Faith, Hope, Love which could be used on a variety of cards or alternatively on a Scrapbook Layout possibly with Wedding photographs.


I started by cutting out my Pierced Stacker Dies in Square and a Circle and embossed the edges with Silver Embossing powder, using Maja Design papers.


I matted and layered my centrepiece with foam tape between the layers to add dimension to my card and added a contrasting blue square of Cardstock behind my Doily to help it 'pop' gluing my sentiment onto the circle.


Using my Flourish #3 Die I cut this out in 2 shades of green card and arranged elements of this Die onto my card.


Layering an arrangement of flowers with Pearl centres onto my card.


Finishing off with a pretty butterfly.

Cheery Lynn Dies Used -

Thanks so much for stopping by today.

Crafty Hugs, 

Julie x


Monday 10 July 2017

I Do - Craft Consortium


Hi everyone, today I am sharing some inspiration using the stunning paper pad call Tell the Bees for my DT post with Craft Consortium. This pad is filled with beautiful papers with Floral and Bee designs and is apt for many celebration cards or scrapbook layouts.

My card today showcases the soft gold designed paper which I thought was perfect for a Wedding or Anniversary card.


I used 3 layers on my card which have been tattered at the edges with my scissors and some distressed stitching added around the edges for added detail. I layered up with foam strips for extra dimension.


My diecut frame was heat embossed with a Cream Embossing Powder and whilst still hot I added a sprinkle of Gold Powder on to it. Adding my vintage image and lots of bling.


Craft Consortium have a range of beautiful vintage embellishments and laces in their Always and Forever collection, perfect for finishing off my card as if a piece of lace from the Bride's dress has been used.


Thanks so much for all your lovely comments and please do check out Craft Consortium and follow them on Facebook and Instagram for regular inspiration and giveaways.

Crafty Hugs, 
Julie x 

Craft Consortium Products Used -

Cheery Lynn Die - DL286 Mirror Mirror Doily Frame

Friday 7 July 2017

Vintage Memories - Cherish The Memory


Hi everyone, today I am sharing a masculine styled card with you all for my DT post with Cherish The Memory.


I started by cutting a sheet of my 6x6 paper pad into one inch strips. I tattered at the edges with my scissors and then rubbed my clear Versamark Ink down the edges, heat setting Copper Embossing Powder. Next I sprinkled onto the paper a Verdigris Embossing Powder and heat set.


I then added my Cheery Lynn die - Border #15 which had also been Heat set with Embossing powders to give a rusty look.


I made a collage using my papers from my Vintage pack, diecut sheets and inserting a couple of metal cogs for extra texture.
Please check out Cherish The Memory Etsy Shop to see their beautiful range of papers and craft packs with new items being added weekly. You can also follow them on the following links :

Crafty Hugs, 
Julie x

Tuesday 4 July 2017

Forever Friend


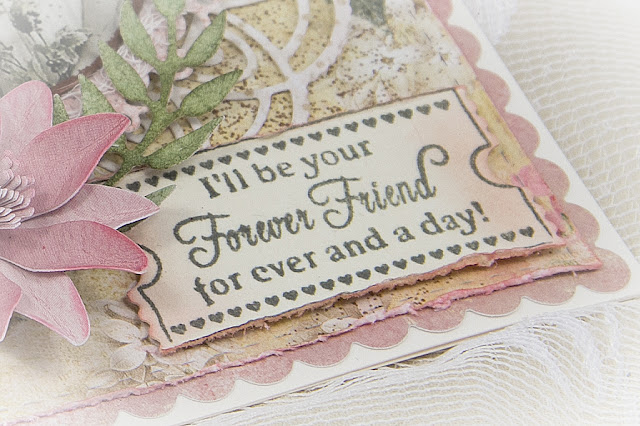
Hi everyone today for my DT card at Cheery Lynn Designs I am sharing some Vintage inspiration on my latest Forever Friend card.


My papers used on this card are from Lemoncraft. I started by cutting out my Stacker Layers, sprinkling some copper embossing powder onto my paper and heat setting for a shabby feel. I tattered and inked my faux stitched layers, layering onto my card with my beautiful die cut Doily as an accent in the background.


My image was die cut out using my Stitched Circles adding copper embossing powder to the edge to frame it, adding an accent of cheesecloth and layering onto my die cut layers.


I have small Whimsy ticket stamps that I stamped with Archival Ink and shaded with Distress Ink, I die cut out and tattered the edges slightly with my scissors.


My flowers were shaped on my Embossing mat and once the glue was dry I added some Distress Ink to the edges for definition. Finishing my card with a touch of lace and pearls.

Cheery Lynn Dies Used :

Thanks so much for stopping by today and for all your lovely comments. 

Crafty Hugs, 

Julie x 

LinkWithin

Related Posts Plugin for WordPress, Blogger...
01 09 10