Translator

Saturday 31 January 2015

Shabby Butterflies


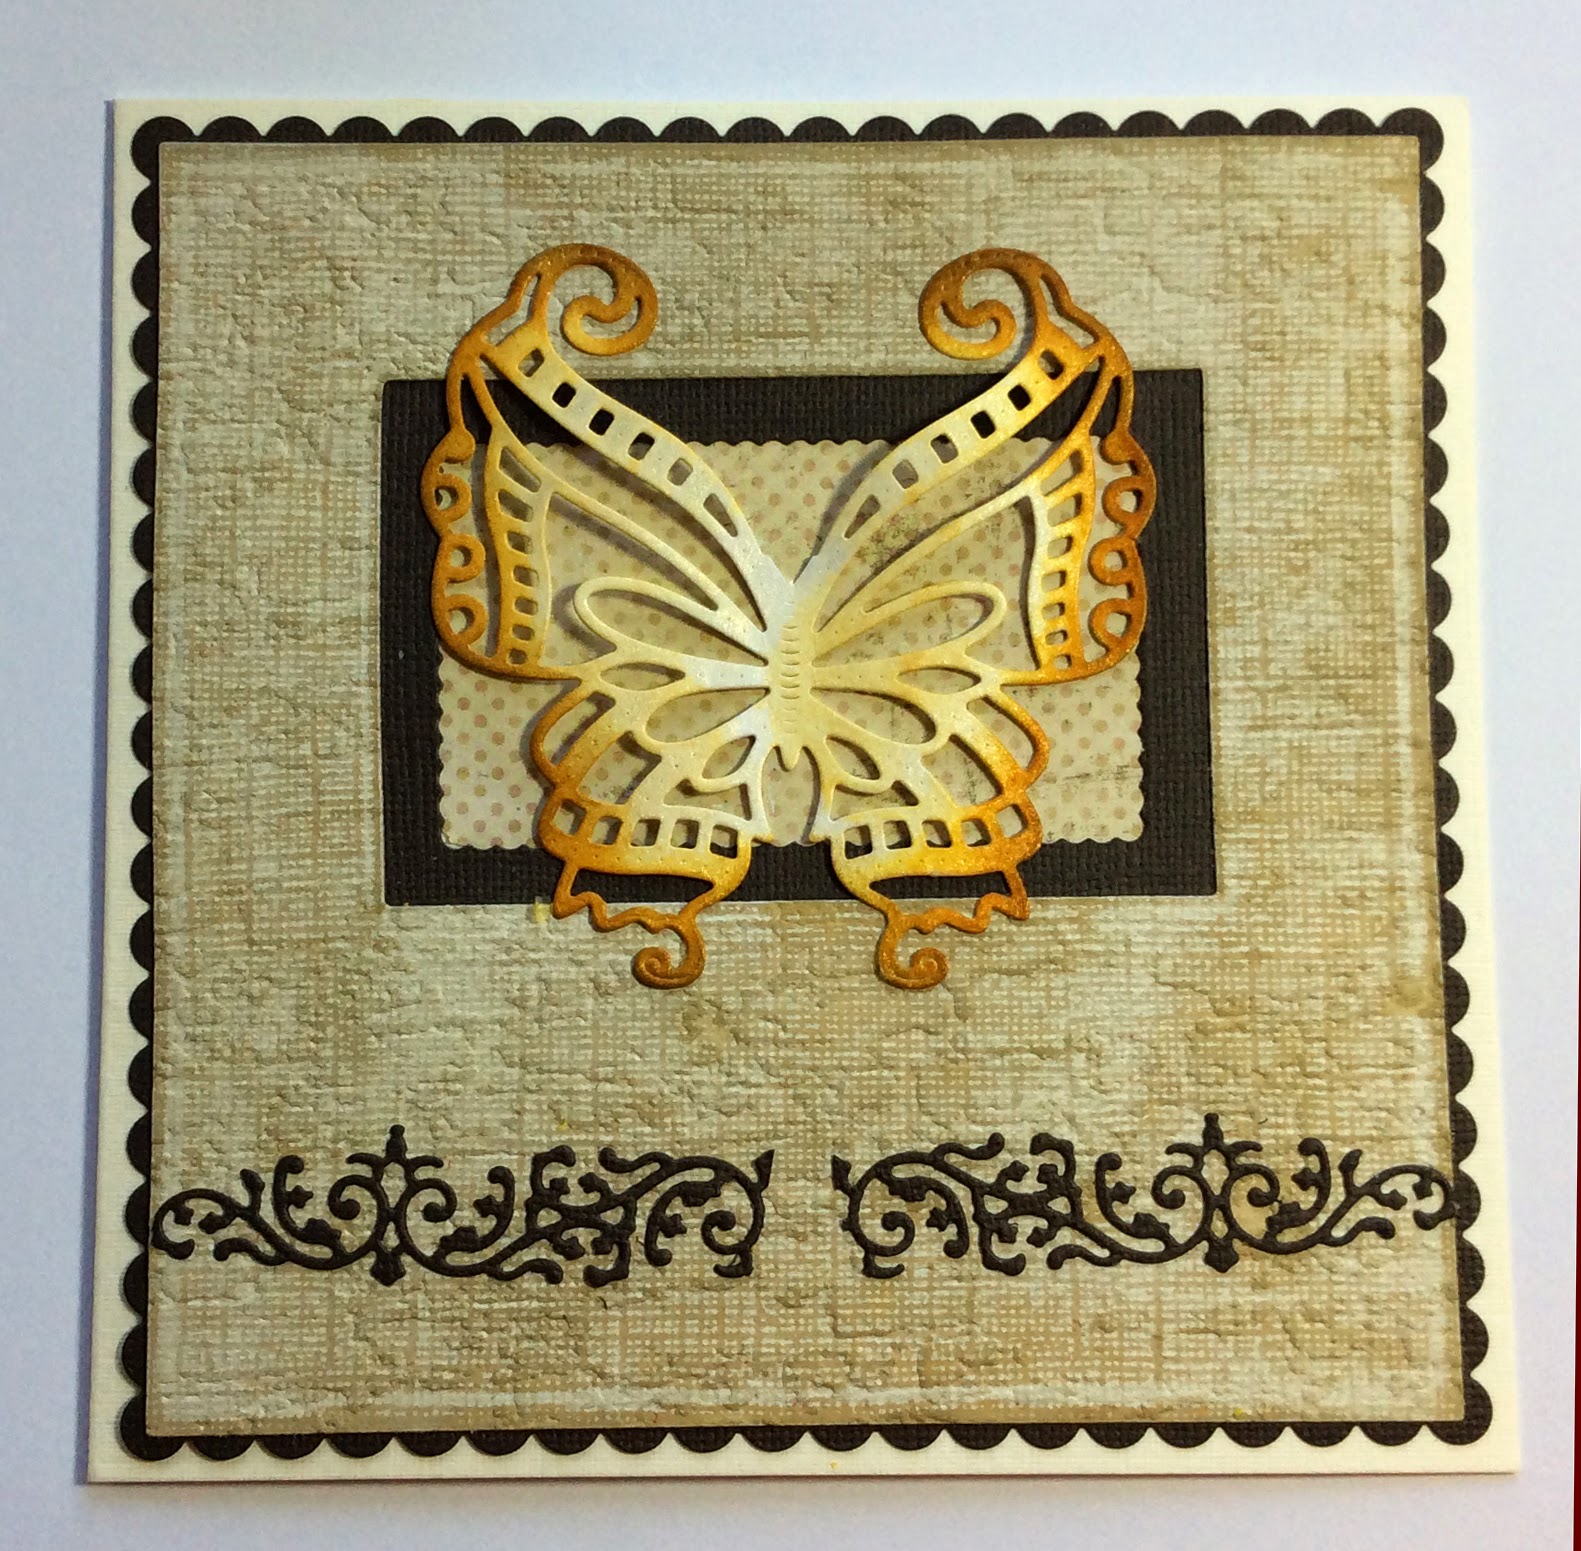
Hi Crafty Friends, I seem to have fallen behind catching up with your blogs but I have been under the weather with a kidney infection recently and hope to catch up soon. My Cheery Lynn Designs DT project this week that I'm sharing with you is a Shabby Style card with some mixed media on it. It is approximately 5 3/4 inches square in size.


Here is the start of the layers on my card. I cut a square of patterned paper and then placed my Dutch Daisy Border die on with some low tack tape to cut. I used my Distress Tool around the edges and added a couple of scraps of paper which I inked at the edges.

I then applied some Texture Paste through a strip of Sequin Waste to act as a Stencil. Once dry I added a little Distress ink to coordinate with the paper.


I used the large and medium die in the Sentiment Tag set, cutting white cardstock and adding a little Distress ink to the larger die before layering up and adding some Stickles around the middle. I then layered onto my Alpine Flourish.


My Butterflies were cut in patterned paper and layered up twice.

Hope you have enjoyed looking at my card and now feel inspired to try this style of card. 

Thanks for stopping by and I hope you have a creative weekend,


Julie x

Shop at Cheery Lynn for :


Saturday 24 January 2015

Steampunk Valentine


Hi Everyone, for my DT post at Cheery Lynn Designs this week I made a Valentine card with a Steampunk twist to tie in with their Challenge - Sweethearts ' Add a Heart '


You will see on this photograph how I cut my first layer in red card adding the Gear dies, layering some to the front and some behind. I cut a lot in half as new this was the area that was only going to be seen on my card.

                                                            
                                                         B523 Deutchland Border Set      


                               DL292 Lords and Commons A2 Stacker Frame

The next layer showcases two of our new dies which you can position anywhere on your card, the choice is yours.


I added my steampunk corners to the sides, layering on more Gears and adding a little Stencilling with inks onto my paper. See how the die cuts really pop mounted onto the red card.


My Stampotique images were kindly given to me by my blog friend Donna from Inky and Quirky. I fussy cut the figures out and coloured with Copic pens - aren't they cute !


My Hearts and Arrows were cut out in Red, Black and White Cardstock, you will see how I paper pieced the layers back together which adds dimension and a shadow effect.


My sentiment was a sticker in my stash.

Thanks for stopping by I appreciate your visit and comments, 

Enjoy your Weekend.

Julie x 

Shop at Cheery Lynn for - New Release: 


Other Cheery Lynn Dies


Friday 23 January 2015

Love is in the Air


A warm welcome to my new followers and regular visitors of my blog. Today at A Vintage Journey is the start of a new challenge called Love is in the Air, chosen by Astrid. For my DT post, I decided to make a Memory Album which is roughly 6 inches square which I gave to my Husband Chris - AKA The Photographer, on Our Anniversary to hold photographs of us on each year as we celebrate our Special Day.

I used a link from YouTube to make my Memory Album which is HERE. I did make a few adaptions to it along the way, but It's well worth a look should you want to make one.


I used chipboard sheets to make my Memory Album to give it the feel of a book. I layered on Kraft core paper which was tattered at the edges using Tim's Distressing tool.


Cream patterned paper was next added which I had layered Stencilling with Distress ink and Sentiment stamps with Archival Ink.


I also added Die Cuts and Metal Corner embellishments.


You will see on the inside of my album I painted the perimeter and added a text stamp with Archival ink before gluing in my pages to the album.


On the Spine of my Album I added a layer of Kraft Card wrapping it an inch over the edge of the front and back. Next layering on lots of garden string with PVA glue, once dry I trimmed the edges.


I punched a hole with my Crop-a-dile and added some Ideaology and old beads.


A couple of ATC's were made using inks and stamps with personal messages on the back, which slip into their pockets.


Inside I have strengthened the flexible spine using Tim's Tissue Tape and I love the finish it gives to my album.


As my pages are completed I will add Tags with more handwritten memories, little pockets and flaps to lift, using Tim's Style and goodies.

Please check out my Talented Fellow Creative Guides for more Inspiration on this challenge and all the details on how to enter. CountryView Crafts is our generous Sponsor of a £10 shopping spree for the winner.

Thanks for stopping by my blog and for your continued inspiring comments. I really appreciated them.

Julie x

Thursday 22 January 2015

Winter Wishes


Hi Everyone, I am so pleased to be sharing my post today at Frilly and Funkie as their Guest Designer after winning their recent challenge A Vintage Holiday my Altered Frame which you will see HERE. Clicking to enlarge the photographs highlights all my glittered areas better. As you know glitter is so difficult to capture in photos. 

With their current challenge - Winter Wishes I was asked to design something expressing what I love about winter. This was rather hard as I hate our cold wet winters in Scotland with long dark days. But I do like on the rare time when we wake up to everything glistening white and I love to feed the birds in the winter time especially my beloved Robin - Ronald.
Now gathered with inspiration I decided to make a wall hanging using a Canvas Board.


I first of all glued a Cheery Lynn Snowflake die all over my board.


I layered on some scraps of old music sheets and used Texture paste to add my Ivy. Once dry I placed my stencil back over my textured areas and started to add Distress Ink, building up colour. I also added in Pine Needles later on.


My little Robin's body was cut out 3 times in chipboard to make him more 3D. I added Distress paint to shade him and then used a flourish stamp and Archival ink to add shading. His eye was Black Liquid pearls.


My letters were also cut from Chipboard. I gave them a coat of Gesso. Once dry I added Glossy Accents and Rock Candy Distress Glitter, letting dry before adding some Distress Ink to the edges.


I added a selection of winter greenery die cuts, more snowflakes, glittered icicles, Flower Soft and lots of glitter to give a frosty feel.

Thanks to the Super Talented team over At Frilly and Funkie for asking me to Guest for them today and I hope you all enjoyed your visit to my blog today.


Julie xx

Shop at Cheery Lynn for:


Monday 19 January 2015

AVJ - Tag Monday


Today over at A Vintage Journey HERE you will see some fabulous inspiration from all my fellow Creative Guides for Tag Monday. With my New Year Resolution for 2015 being to complete Tim's 12 tags this year, I thought this was an ideal opportunity to get started.


I followed all Tim's Techniques shown on his Tutorial here, with a couple of minor changes, including the number one as I preferred this.


I used my brush I never wash to stipple my paint on rather than a Splatter brush. I also spritz a little Tarnished Brass spray from arms length with not having the Distress Spritzer.


My ribbon was made from an old cotton sheet that I ripped lengths from to give frayed edges. I added Tarnished Brass Distress spray and a little water, scrunching it up and squeezing out excess water. Once dry I unravelled my ribbon to reveal a permanent scrunched effect.


The words I chose for my tag all have a meaning to me for 2015.


Our Current Challenge over at A Vintage Journey is Use A Portrait which you still have time to enter. Do check out all the info and inspiration HERE.

Thanks for stopping by my blog today to see my Tag which I am linking to Tim's Blog.


Julie x

Saturday 17 January 2015

Mayan Butterfly Card


Hi Everyone, from a wild, wintry Scotland. Today for my DT post at Cheery Lynn Designs I am showcasing the stunning Mayan Butterfly. There are 4 newly released Large Butterflies available individually in this collection and all have Angel Wings, please check them out HERE.


In this photo you will see how I cut my layers to give an aperture on my card. I used Coordinations Cardstock and sanded it back to reveal a bit of the core, followed by using my Brick Embossing plate to add more texture.


My Mayan Butterfly was die cut 4 times using 300gsm Cardstock.


I then shaded a few colours of Distress Ink to the edges and added a spritz of Mica Spray, drying off with my heat gun.


You will see the difference from one layer on my card to the finished result of the 4 layers. I glued the centre and edges of my Butterfly only bevelling it up slightly so my wings wouldn't lie flat and would add depth and rigidity to them.


My Flourish Band I wanted to be at the edge of my card, so I simply cut it in half as I new I was mounting my flowers across it and this would hide the space in the middle. The Shasta Daisies were layered up with a little Distress ink and Flower Soft added into the centres.

Hope you enjoyed my post today, I really appreciate you stopping by and leaving a comment. Have a lovely weekend.

Julie x

Shop at Cheery Lynn for:


Saturday 10 January 2015

Valentine Card


Hi Everyone, today I am showing you a card I made for my Cheery Lynn Designs DT post using another couple of their New Release dies.


My card is 8x6 in size. I mounted onto this some heart patterned paper and cut out Sophie's Heart Border in red card twice and mounted them side by side. My mixed media doll was stamped and her dress paper pieced on top. I added some gems, Glossy Accents on to her shoes and coloured her in with Copics.


                                                      I used B532 Roses and Leaves.


My flower was cut out in red card stock and I embossed the edges of the petals with my stylus on an embossing mat to give a little dimension. My leaves I also embossed with my stylus, look at the wonderful veins on the leaves, so realistic. We all love putting flowers onto our cards and scrapbooking pages but sometimes too much dimension for Postage Fees makes it impractical to do so and this is where this Rose is perfect. It has such an elegant look to it, don't you think.


                                                      I used B530 Heart and Arrow.


You will notice I have used the arrow part of this die only. I double layered cream and red paper together for a shadow effect, adding it onto my speech bubble which I had stamped a sentiment onto and rubbed a little Distress Ink around the edges.

When you purchase any new dies the best advice I can give you is to familiarise yourself with the die by cutting it out a few times and playing with them on your craft sheet moving them around to see what different shapes you can come up with. Then look at your die cuts and cut areas off, you will then see more shapes. Also remember you can paper piece them together onto other dies and this way you will get many uses from your dies, as I did with the Heart and Arrow die above.

I'd love to hear your comments and I hope you have a wonderful creative weekend.

Julie x

Shop at Cheery Lynn for :


Friday 9 January 2015

Cheery Lynn New Release

Hi Everyone, We are all very excited at Cheery Lynn Designs as this is the first New Release of 2015 and is being launched at the CHA show. I feel so honoured and proud to know my cards will be on display at the Cheery Lynn Designs Stand.

I am showcasing 3 of the new dies today, so please also pop over to the Cheery Lynn blog HERE to see what my talented team mates are showcasing from the New Release. This is a fantastic Release giving you even more versatility with your die cuts, as you can make a variety of patterns with the new border dies and I had amazing fun working with them.


This first card shows one of the new sets of words. Once Upon A Time, I love this little saying as it is so Apt for many cards or scrapbook pages. I decided to use this on a baby card.


You will see in this first photograph I tattered the edges of my layers and then cut out strips from the Horizon frame and paper pieced layering on some ric rac.


Here I started to layer on a row of my corner dies in blue around my frame.


Here you will see another row being placed on.


I placed my ruler across my card to get my wording straight, double layering it.

Cheery Lynn New Release dies used

Other Cheery Lynn Dies Used

My next card 


For my Easter card I have used 2 other new dies,


Happy Easter which was layered up twice and I added some flowers from my Tiny Flower kit.


Now if you look down the sides of this card again you will see this lace pattern. This is one of our new clever border/edger dies which come in sets of 3 and can interlink together or you can use one at a time. You decide where you want to place it on your card to cut. They also compliment Doilies that were out in our previous release for even more versatility and choice to match up on your craft projects.


Cheery Lynn New Release Dies Used

Other Cheery Lynn Dies Used

Click HERE to see all the New Release Dies at Cheery Lynn Designs

Thanks for stopping by and I will be back tomorrow to show you another card using more of the New Release dies.


Julie x

LinkWithin

Related Posts Plugin for WordPress, Blogger...
01 09 10